Configure search options
Catalogues to search
- Login to Administer Settings.
- Go to the Application Settings tab.
- Open the Pre-Processing section.
- Highlight the instance of Search Auto / Search Manual to be configured.
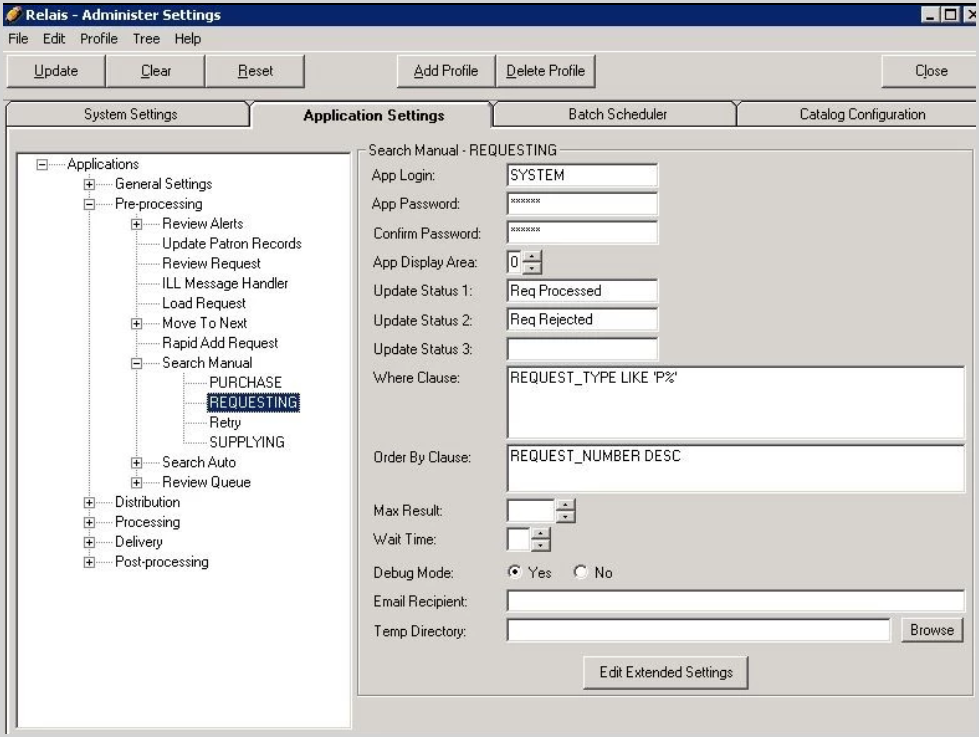
- Click Edit Extended Settings.
- Click Catalogs.
- From the Catalogs drop down box, select a catalog.
- Click Add.
- Use the up and down arrows to adjust the order in which the catalogs display in the Search Manual tabs.
- Click Ok.
- Repeat this process for each instance of Search Auto / Search Manual.
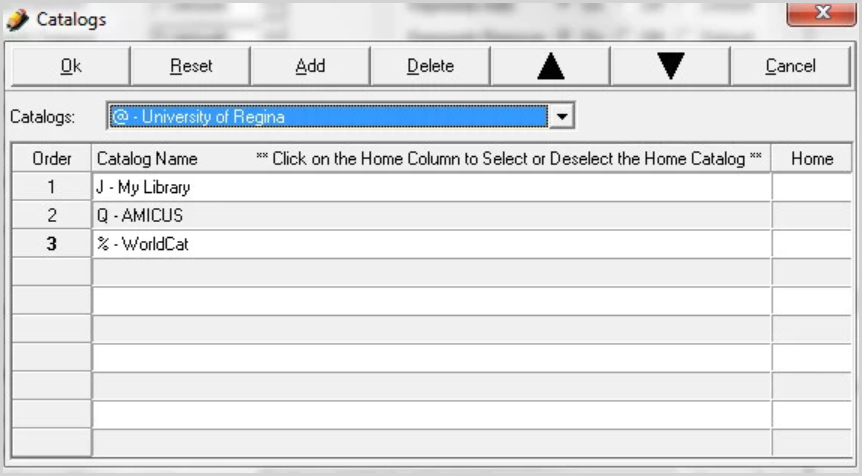
Caution: Each related instance of Search Auto and Search Manual must have catalogs in the same order to ensure Search Auto results display for the correct catalog tab when viewed within Search Manual. For example, if you have Search Auto - Requesting Articles configured to search your home library and AMICUS, then the same catalogs must be configured for Search Manual - Requesting, and in the same order. Note in Search Manual, it is possible to configure additional catalogs after the ones used in Search Auto, e.g., WorldCat.
Note: Customers using the Hosted Service must contact OCLC Support to add or remove catalogs from instances of Search Auto. You may add or remove these catalogs from instances of Search Manual since these applications run locally.
Staff review of requests
It is possible to route requests for staff review in Search Manual, even if Search Auto has found a single bibliographic record in one or more catalogues, and build a routing list.
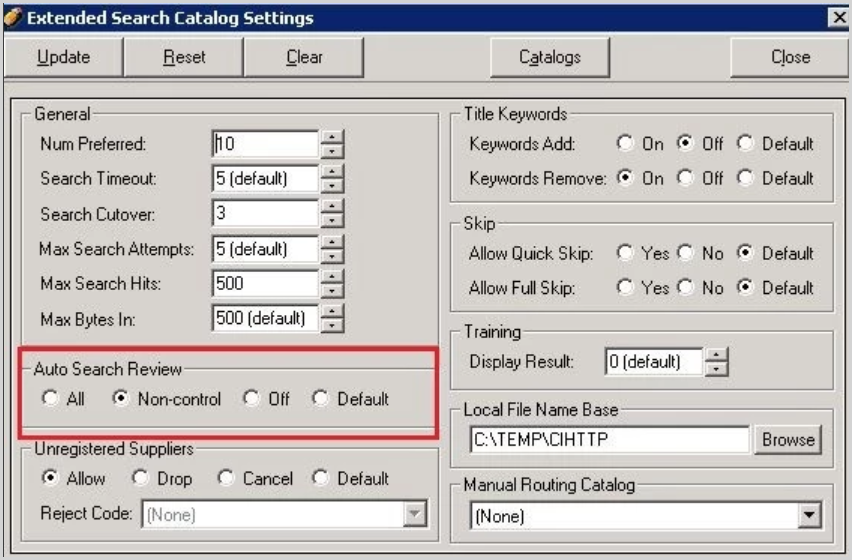
Typically customers configure the following for Auto Search Review:
- Search Auto: Supplying set to Non-control
- When a request finds one bibliographic record based on a control number, e.g., ISBN, the request does not go for staff review, it can go straight to Distribution, e.g., print or email of the pickslip.
- Search Auto: Requesting Books set to Non-control
- When a request finds one bibliographic record based on a control number, e.g., ISBN, the request does not go for staff review, it be send to the first location in the routing list. The routing list is built automatically based on the locations found in Search Auto and the preferences configured.
- Search Auto: Requesting Articles set to All
- All requests go for staff review irrespective of what Search Auto finds.
If Search Auto found only one bibliographic record in one or more of the catalogs configured and so a routing list was built for the request and you want this request to be sent on automatically with no staff review, then set Search Auto Review to Off.
Configure Auto Search Review
- Login to Administer Settings.
- Go to the Application Settings tab.
- Open the Pre-Processing section.
- Highlight the instance of Search Auto to be configured.
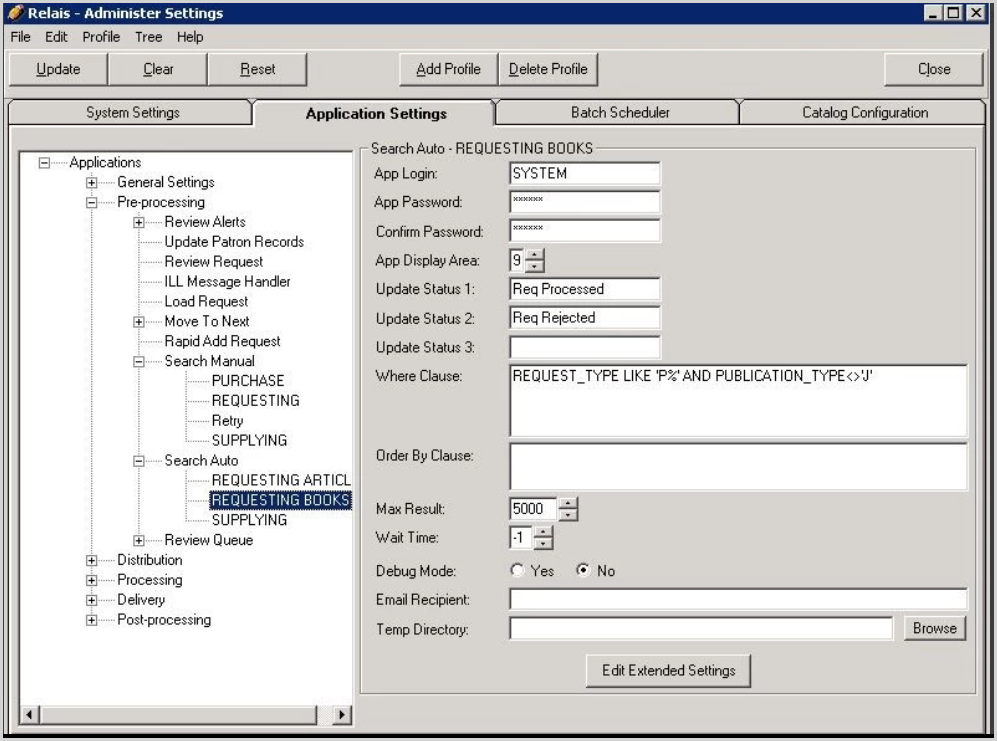
- Click Edit Extended Settings.
- Set Auto Search Review to All, Non-control or Off.
- Click Update.
- Repeat this process for each instance of Search Auto.
Unregistered suppliers
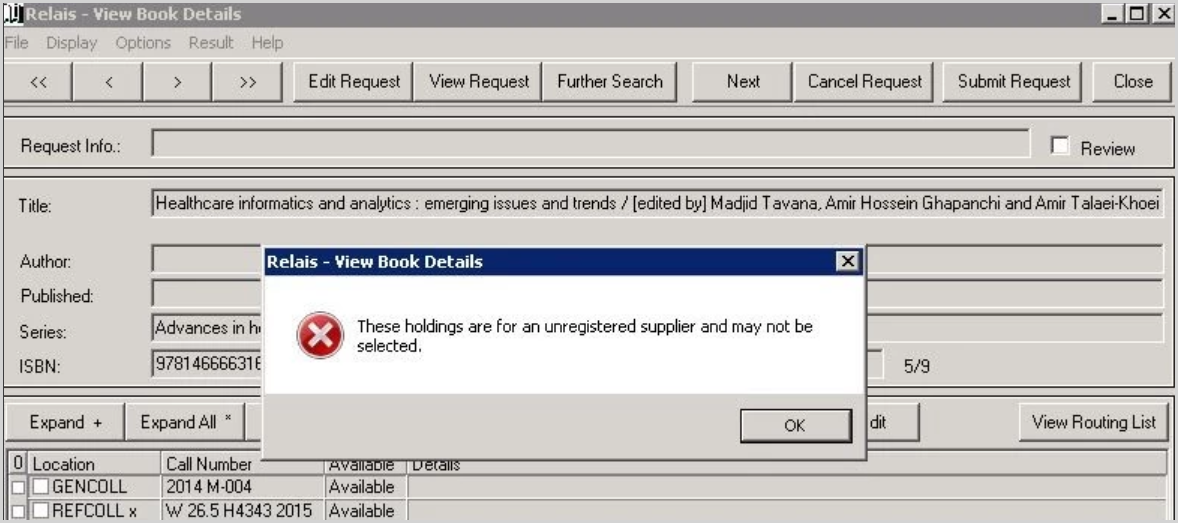
Locations found in a catalog search for which there is no corresponding suppliers record display in Relais with an x.
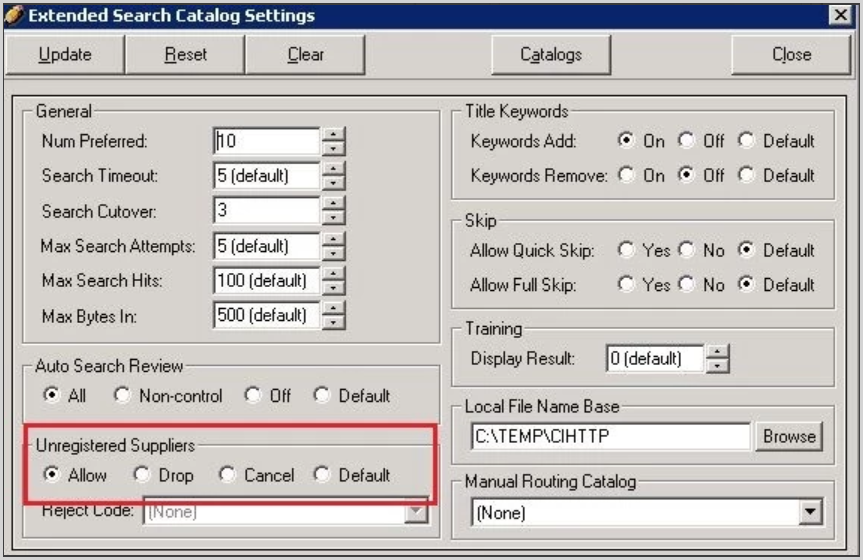
There are three options available for determining how to process requests that retrieve locations that have not been registered as suppliers in Relais:
- Allow: (Default). If the location retrieved is not a registered supplier then the location is used and it is added to the end of the routing list.
- Drop: If the location retrieved is not a registered supplier then the location is not used in the routing list. In Search Manual, staff are not able to select unregistered supplier when this setting is set to Drop.
- Cancel: If the location retrieved is not a registered supplier, then the location is not used in the routing list and if all locations retrieved are not registered suppliers, then the request is rejected automatically with the reject code specified in UnregisteredRejectCode.
Configure option to use
- Login to Administer Settings.
- Go to the Application Settings tab.
- Open the Pre-Processing section.
- Highlight the instance of Search Auto to be configured.
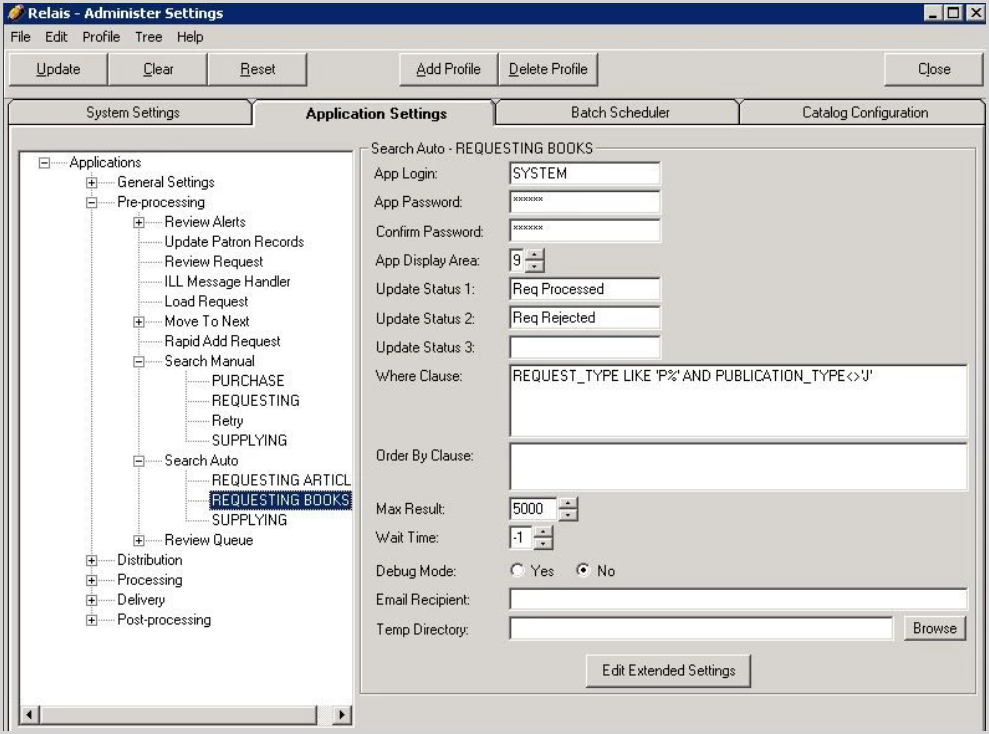
- Click Edit Extended Settings.
- Set Unregistered Suppliers to Allow, Drop or Cancel.
- Click Update.
- Repeat this process for each instance of Search Auto and Search Manual.
