Borrower high usage count
Learn how to create and print the Borrower high usage count in Amlib.
There are several report templates to count high Borrower usage. The report templates are designed to show items used more than 3, 6, 10 or 100 times within a specified period (using the F7 Where statement). The report templates will list the title and the number of times used.
- &BORHCNT.QRP - Shows transaction count (available on request)
- &BORHCNTC.QRP - Shows transaction count by Class (available on request)
- &BORH3.QRP - Shows count where transactions > 3
- &BORH6.QRP - Shows count where transactions > 6
- &BORH10.QRP - Shows count where transactions > 10
- &BORH100.QRP - Shows count where transactions > 100
The reports are run against the Borrower History. Users that delete data from the Borrower History table need to be aware of the limitations of results.
Load/check the template type
- Launch the Amlib client.
- Go to Main > Reports > RepAddNew.
- The Report Files window will open.
- From the Report Entity drop-down, select the Report Screen (module) you would like to load a template for – for example: Borrower.
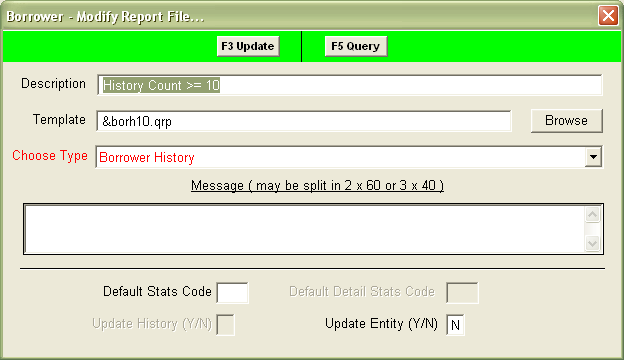
- Highlight a borrower history report (see list above) and click the F2 Modify button – the Borrower Modify Report File window will open
(To load a new report template: click the F1 New button instead). - Type in a Description – for example: Borrower History Count.
- Choose Type: – ensure that Borrower History is selected.
- You can leave Default Stats Code blank.
- Update Entity (Y/N) = N.
- Click the F3 Update button.
- Close out of the Report Files window
The template is now loaded and available for use in a Report.
Create report
- Go to Main > Reports > RepBorrower.
- Select F1 New – the Select Report Format screen will appear
- Highlight the Stockitem History report template you would like to use – &BORH3.QRP (Usage Count > 5), &BORH6.QRP (Usage Count > 10 ), &BORH10.QRP (Usage Count > 10) or &BORH100.QRP (Usage Count > 20).
- Click the Select button.
- Type in a Description – for example: Usage Count > 6 Issues.
- Ensure the Update Entity (Y/N) column is set to N.
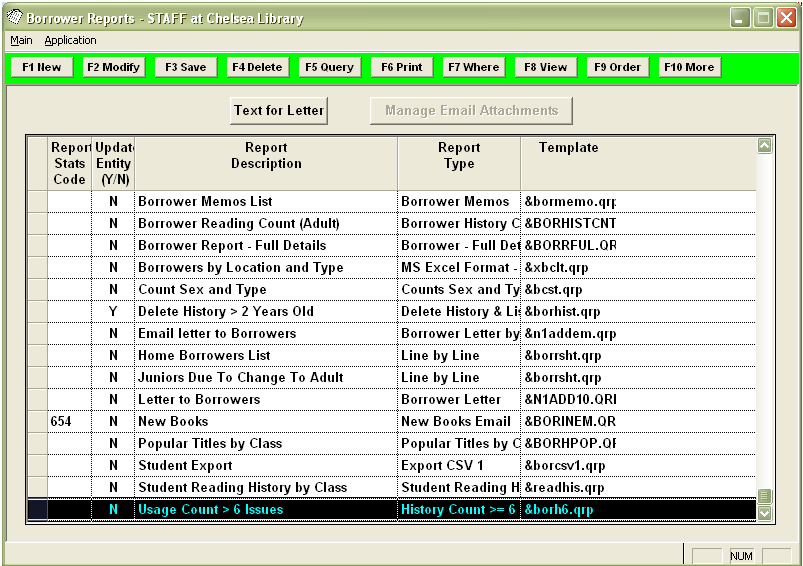
- Click F3 Save.
Where search parameters
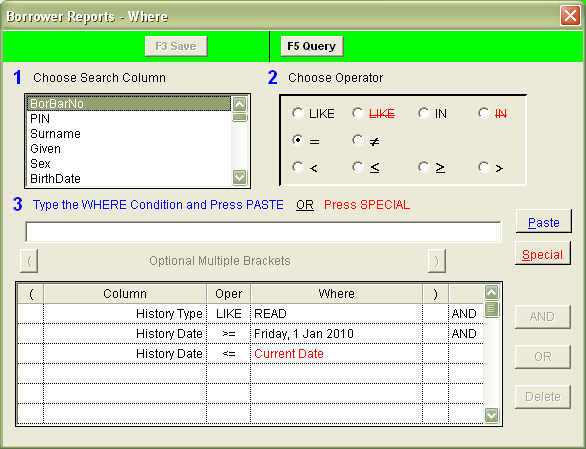
- Highlight the report and select the F7 Where button – the Borrower Reports – Where screen will open.
- Enter the following Where search:
- History Type LIKE READ
(Use the Paste button to insert the parameter into the list at the bottom of the screen) - Enter a start date: History Date >= enter a date in DD/MM/YYYY format – for example: 01/01/2010
- Enter a finish date: History Date <= enter a date in DD/MM/YYYY format – for example: 10/10/2010 (a finish date is optional – if not inserted, the report will go up to the current date).
- You may want to add other restrictors – for example: Borrower No = or Borrower Class =
- History Type LIKE READ
3. Click the F3 Save button when complete – this will close the Borrower Reports – Where screen and return you to the Borrower Reports screen.
Order by parameters
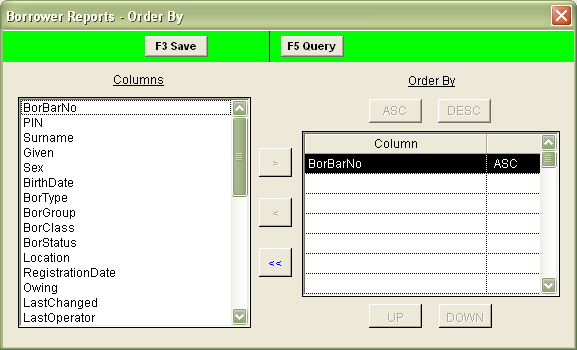
- Click the F9 Order button – the Borrower Reports – Order By screen will open.
- Select BorBarNo from the Columns list and arrow it across into the Order By list.
- Click the F3 Save button when complete – this will close the Borrower Reports – Order By screen and return you to the Borrower Reports screen.
View/print report
- Highlight the report you wish to run and select the F8 View button.
- The following message will appear:

- If you would like the report to run using the entire database (rather than a Saved List) then select No.
- The report will then display:
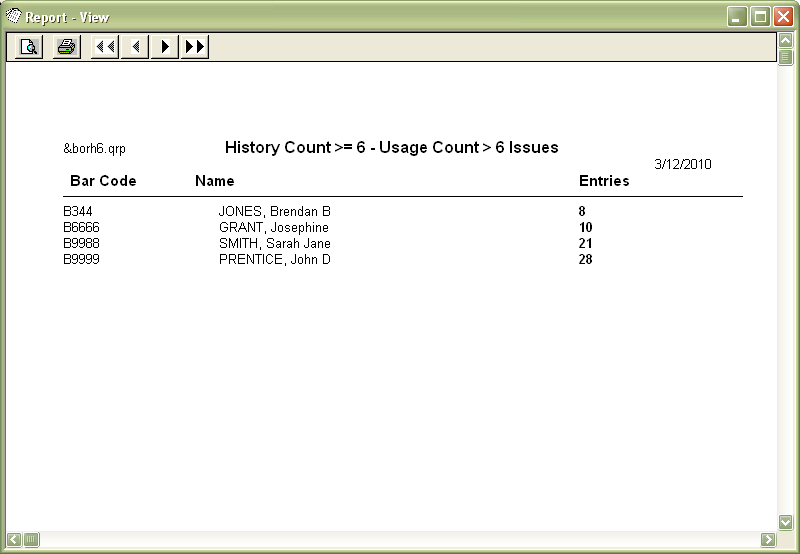
- Select the print button to print the report.
